Pave Prototype Update and a Super Clydesdale Journey on the PAVE

Work on the stainless steel prototypes have been moving along slowly. The bikes, the Pave and Velo Routier Stainless Steel have been out in the Pacific Northwest and are presently at  P.T. Cyclery  in Port Townsend, WA. where you can test ride them and give us some feedback. We will be building a second set of prototypes this fall.

David Toman, a self-declared “Super Clydesdale” gave us full report on his extended ride:

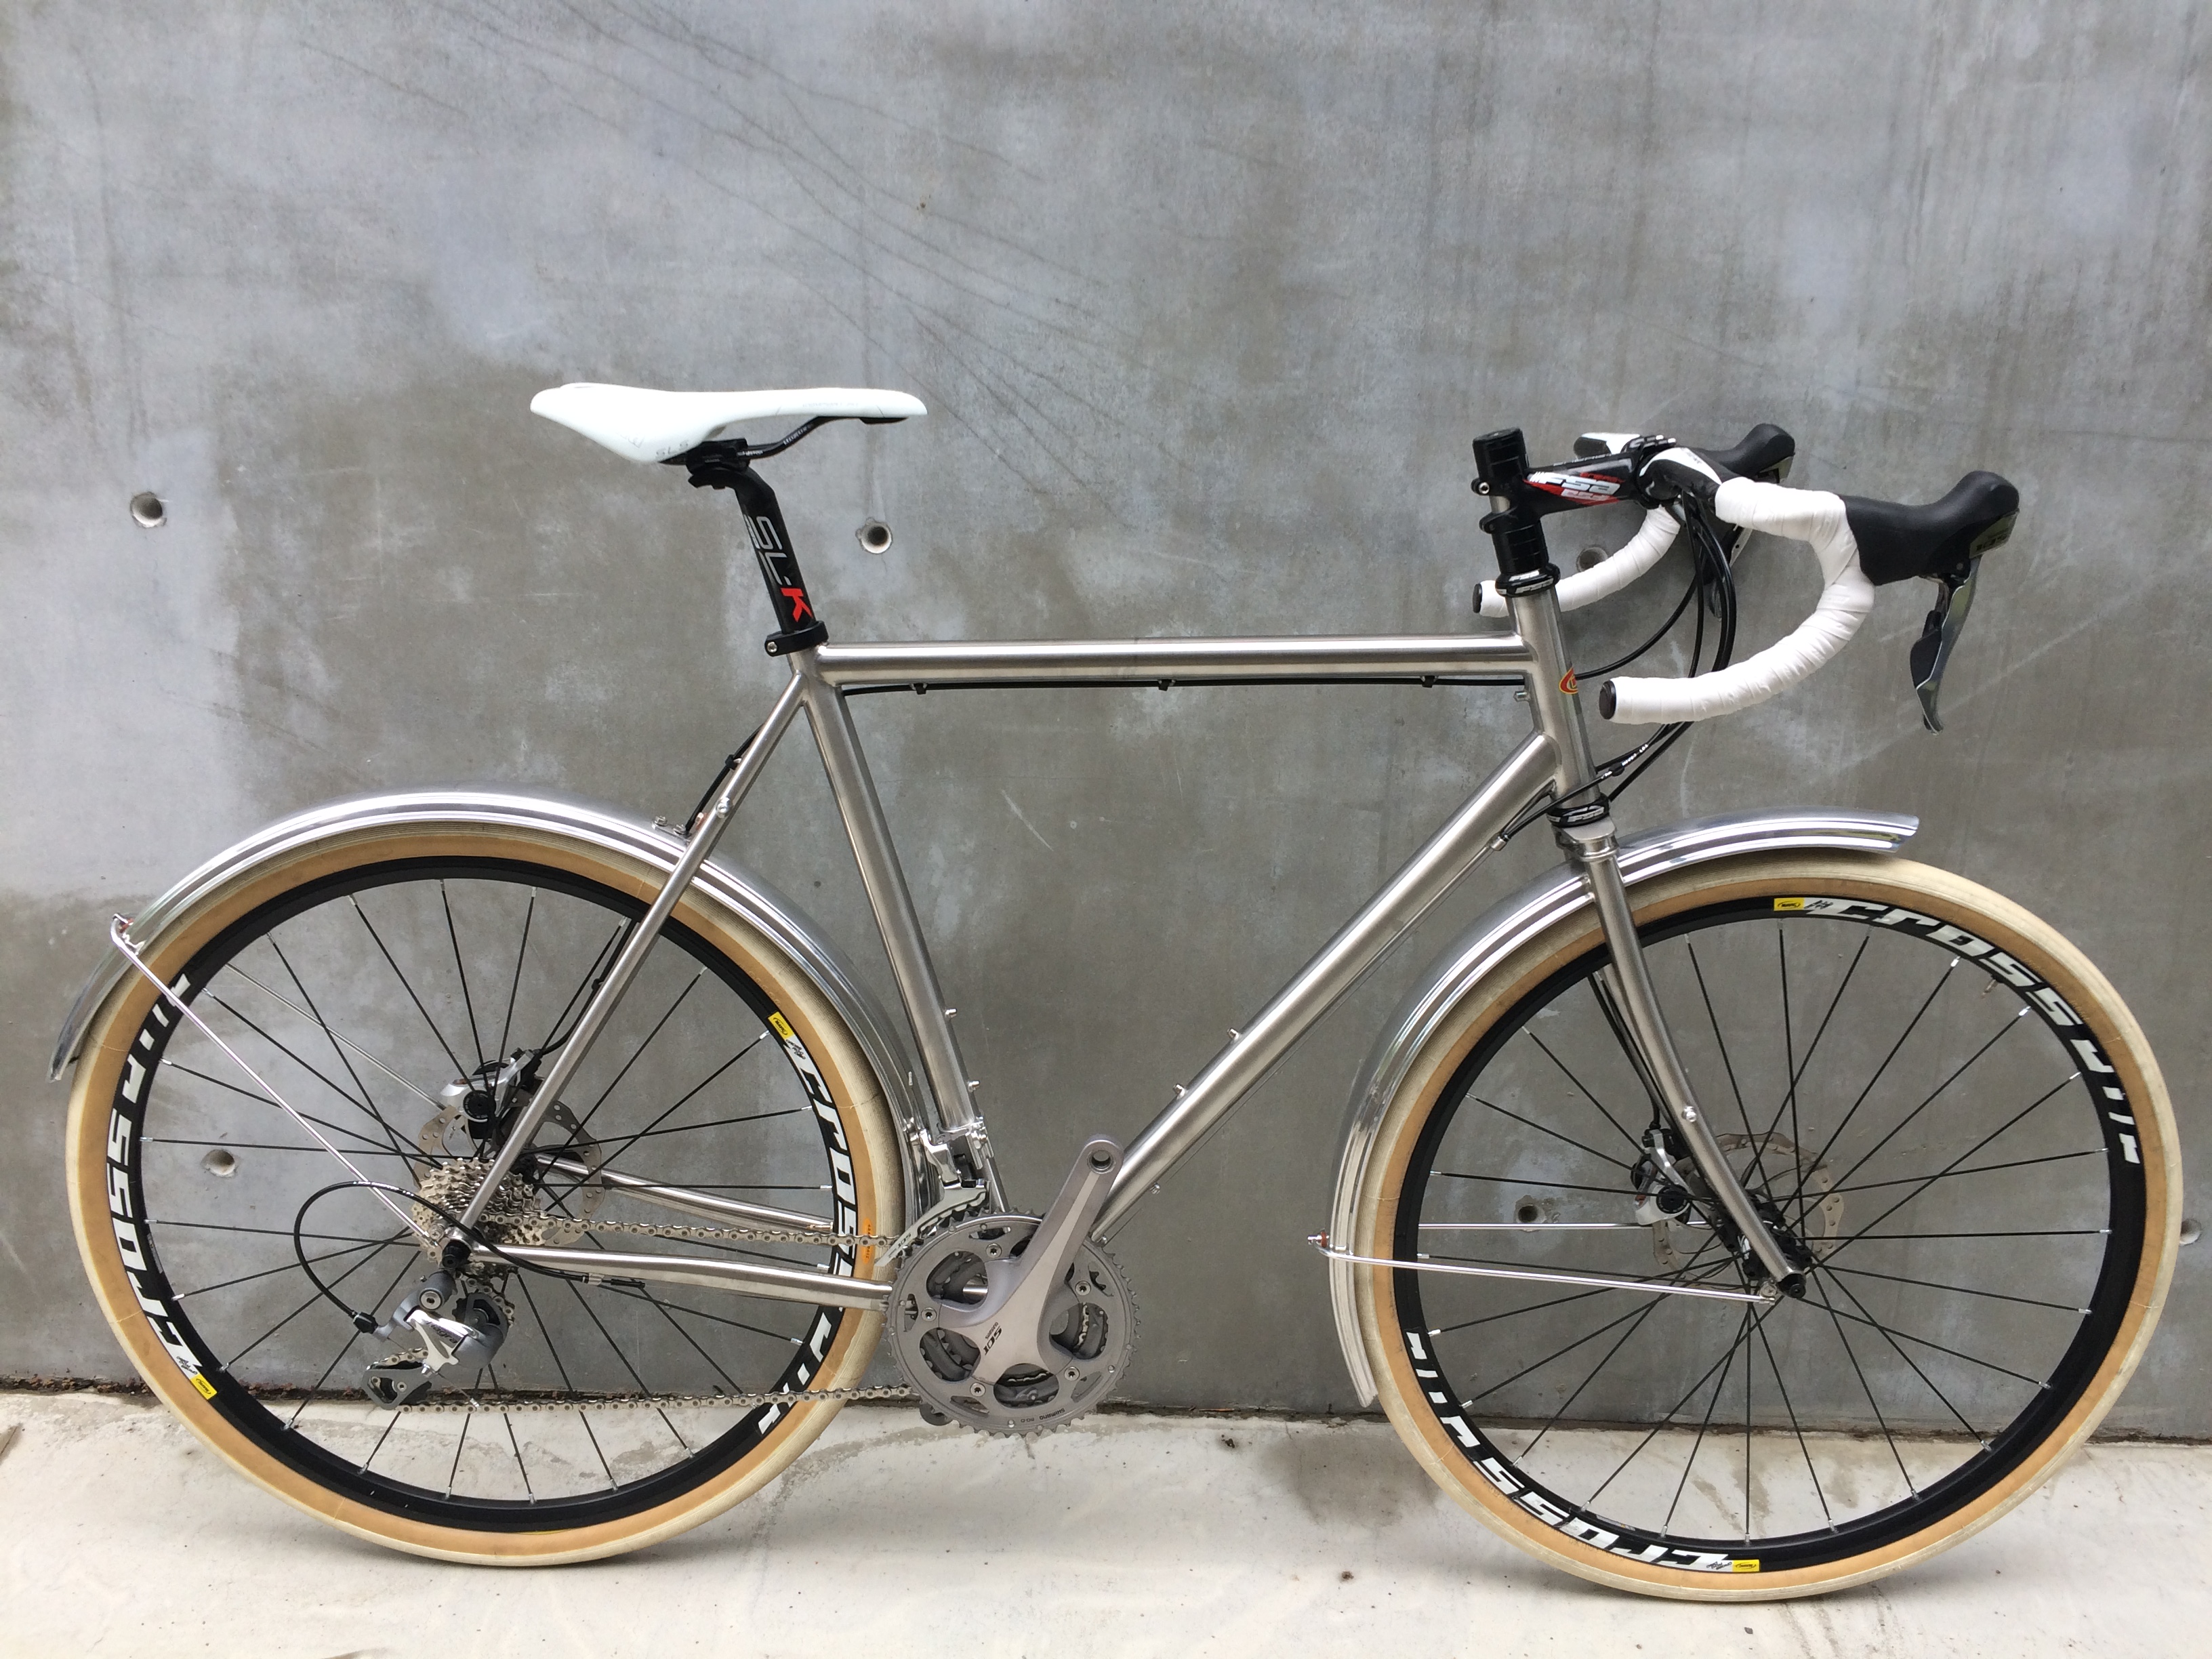
It has been three days now since I last swung my leg over Cycle Toussaint prototype bike the PAVE’. I still can feel the yearning of both myself and the bike to see what is beyond the next mountain. Where would this road or trail go? Can we do that downhill part again but even faster? I know to some it is hard to think of a bike having a soul but this one does. For me I was immediately connected to the Pave’ on my first trip. Granted I had some concerns about the rear wheel being only 24 spoke.
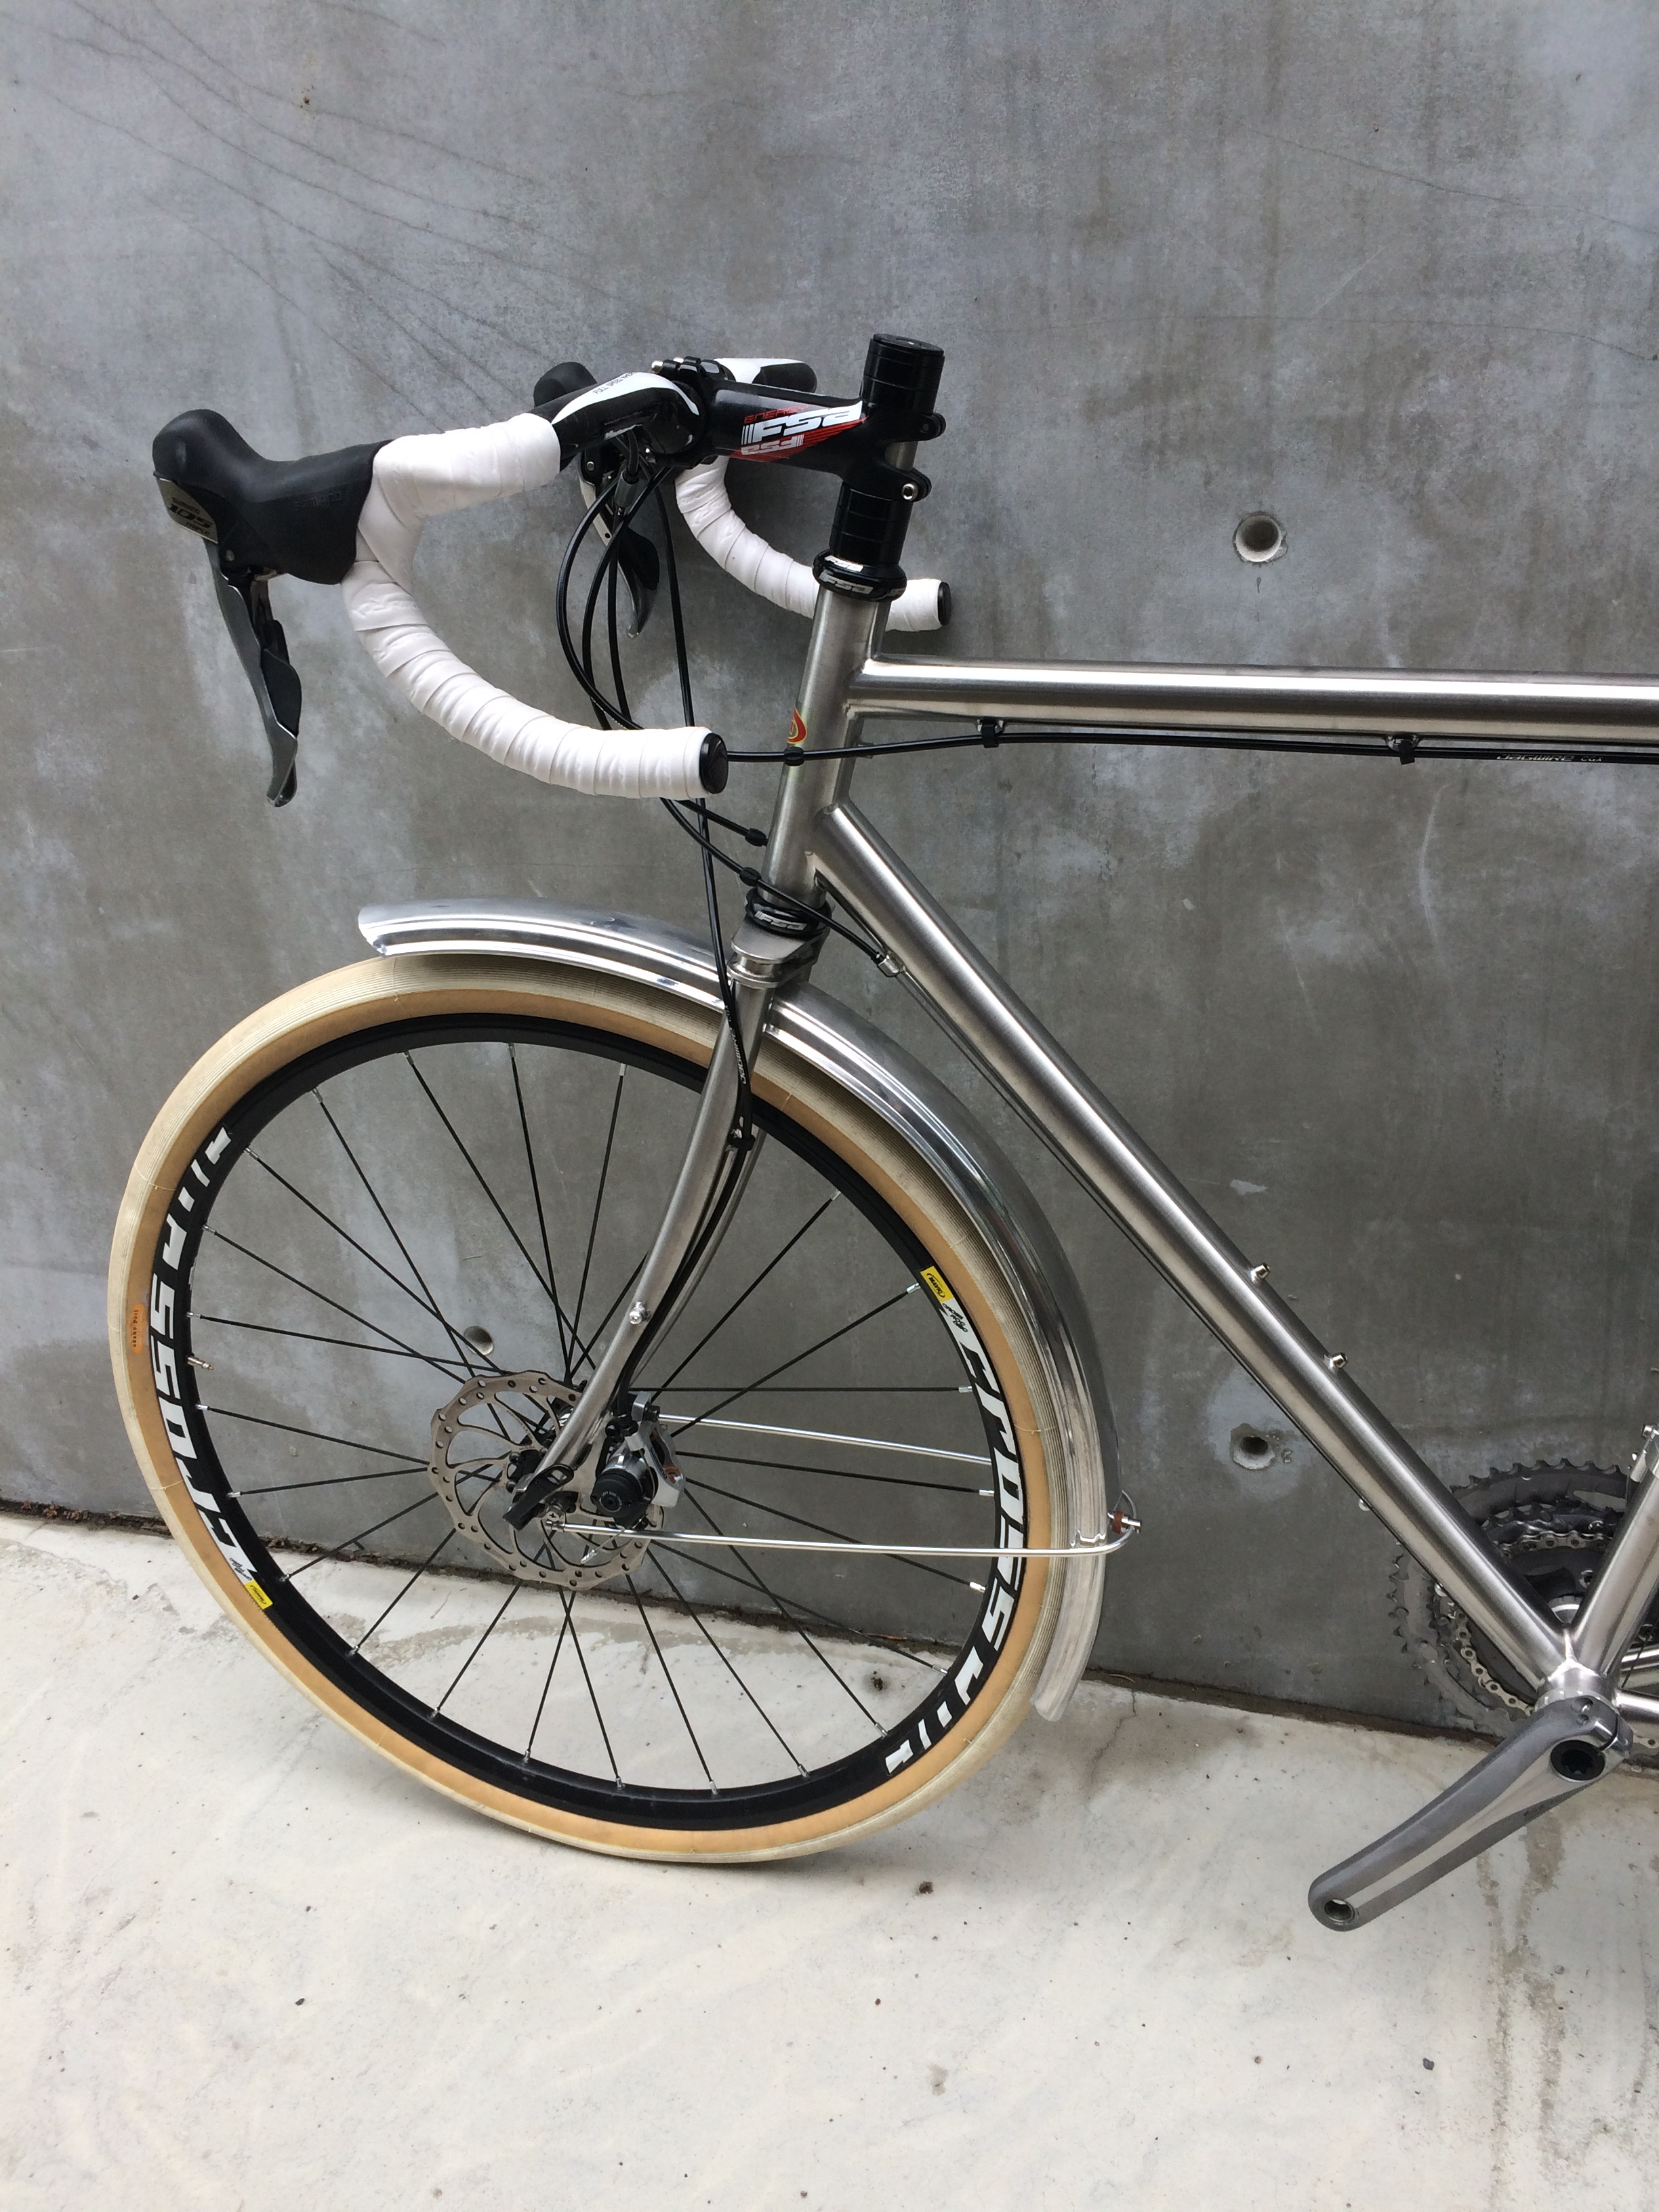
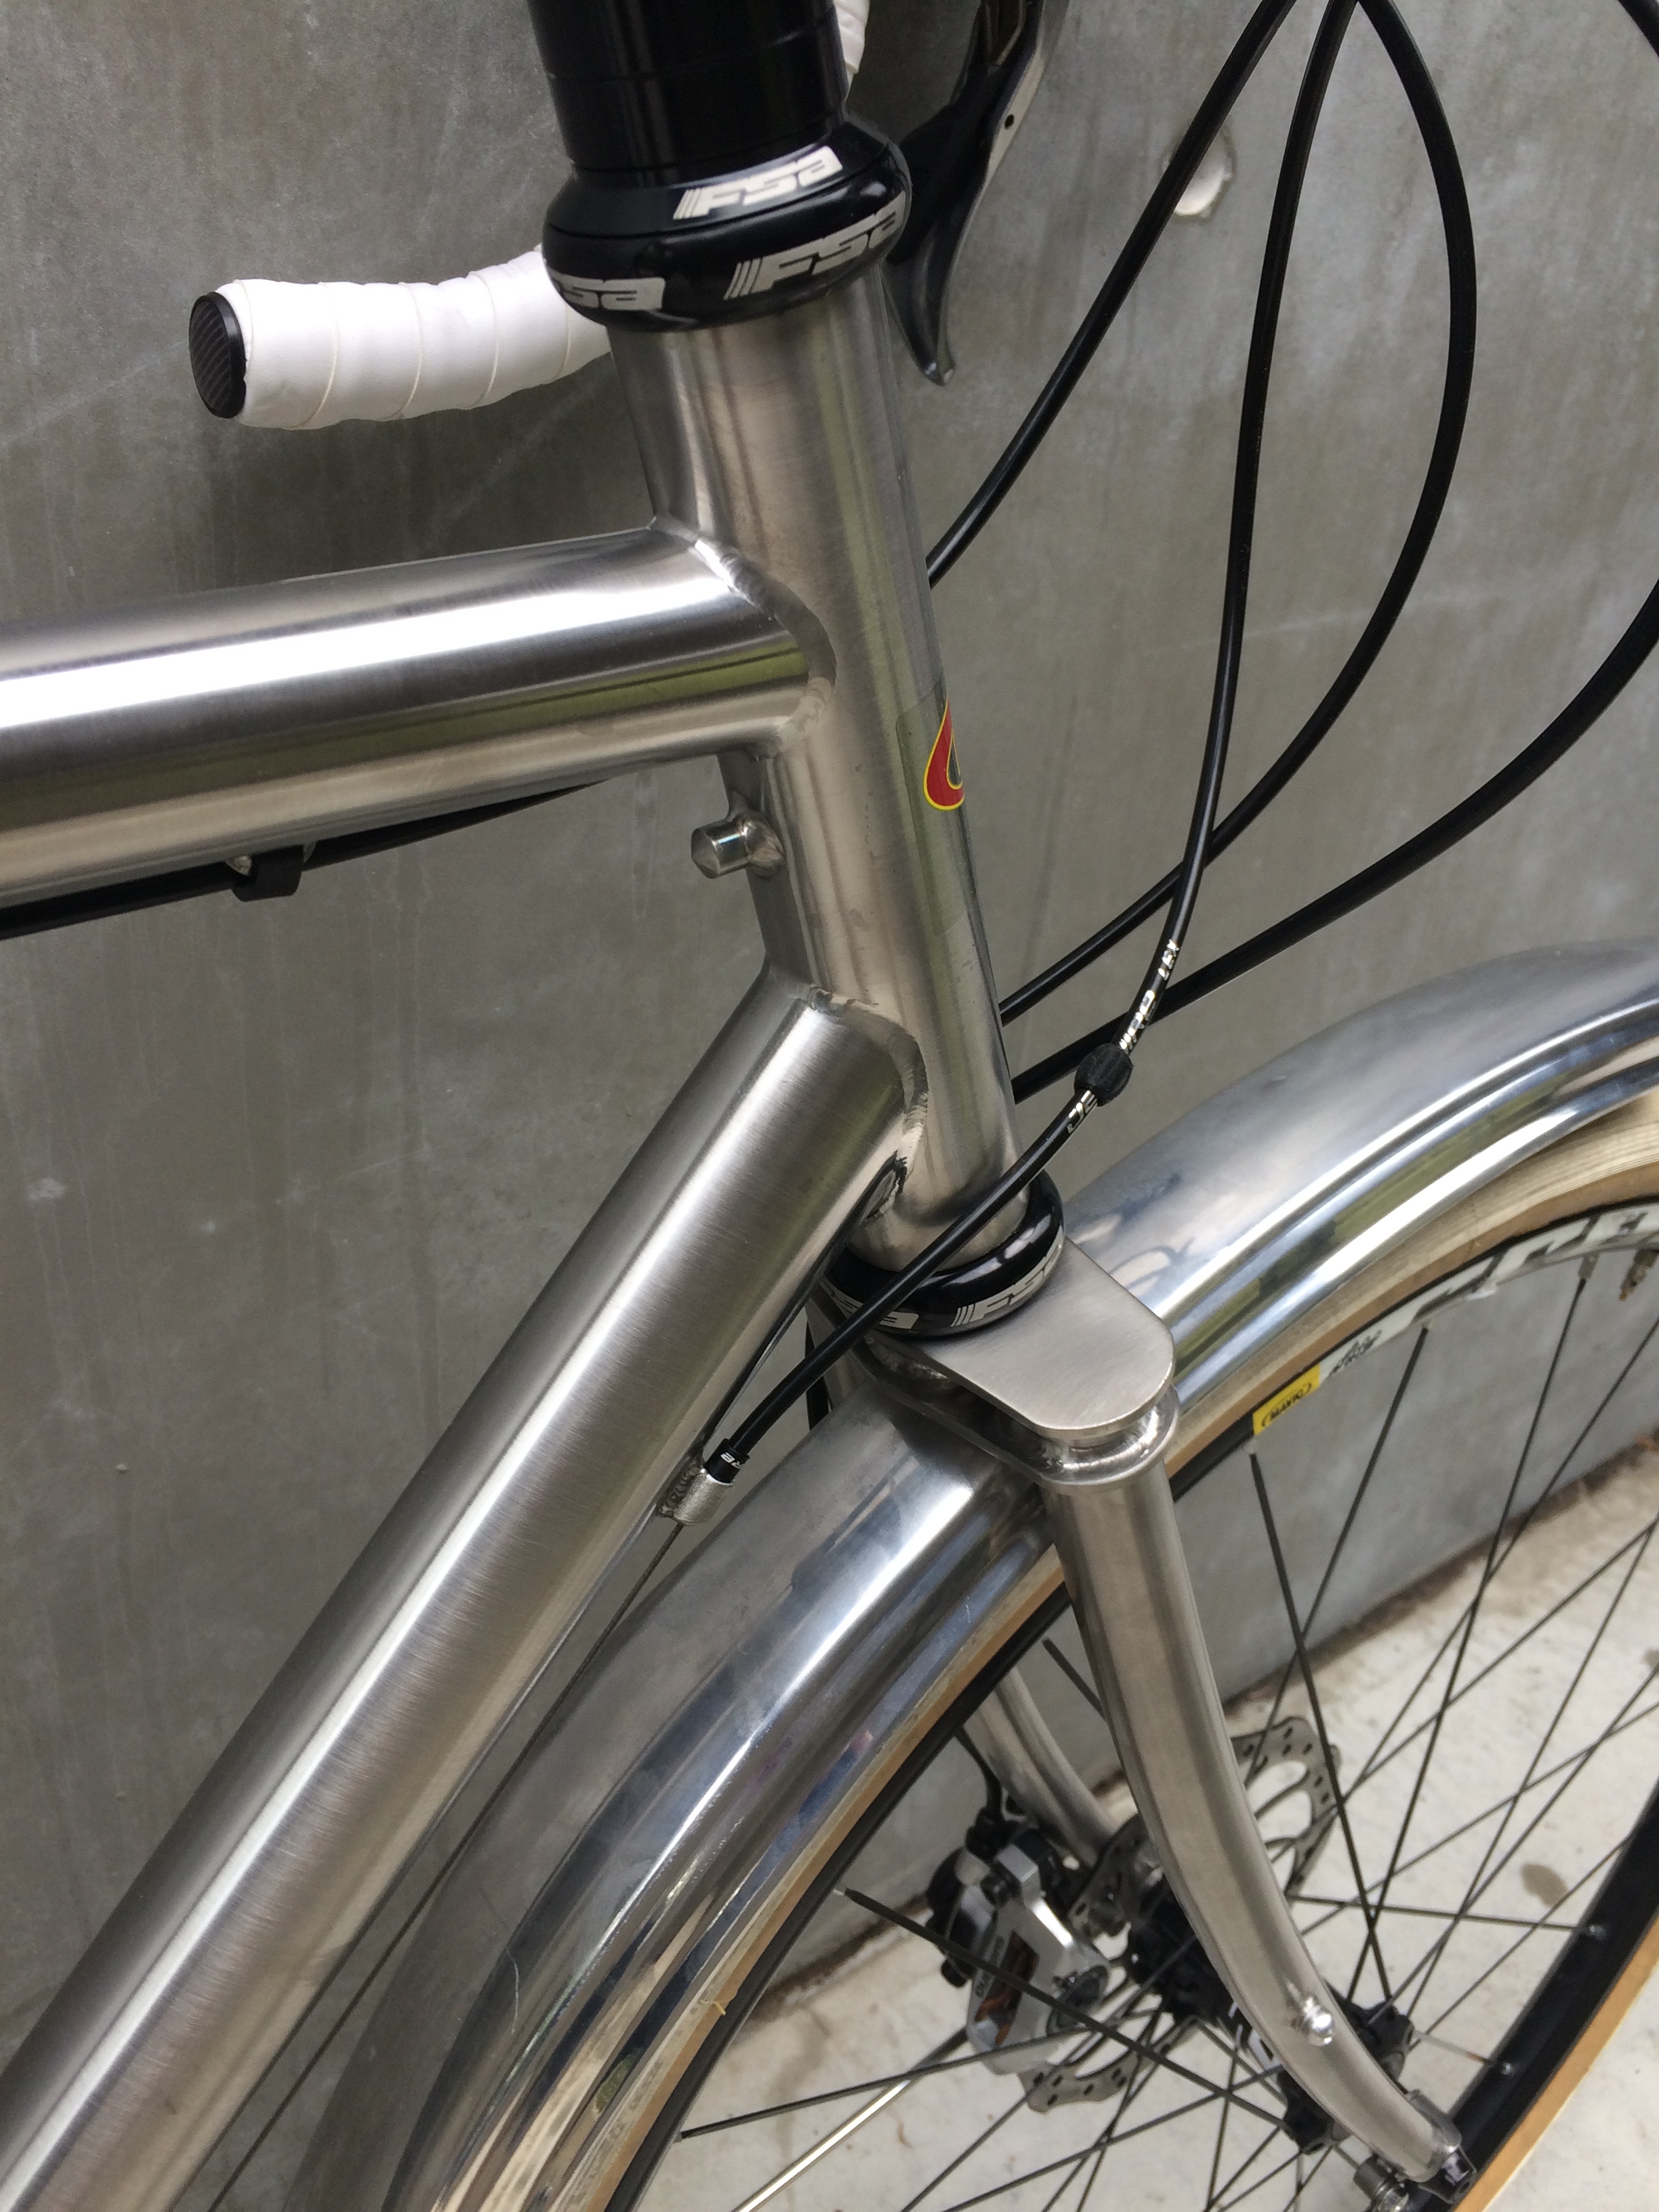
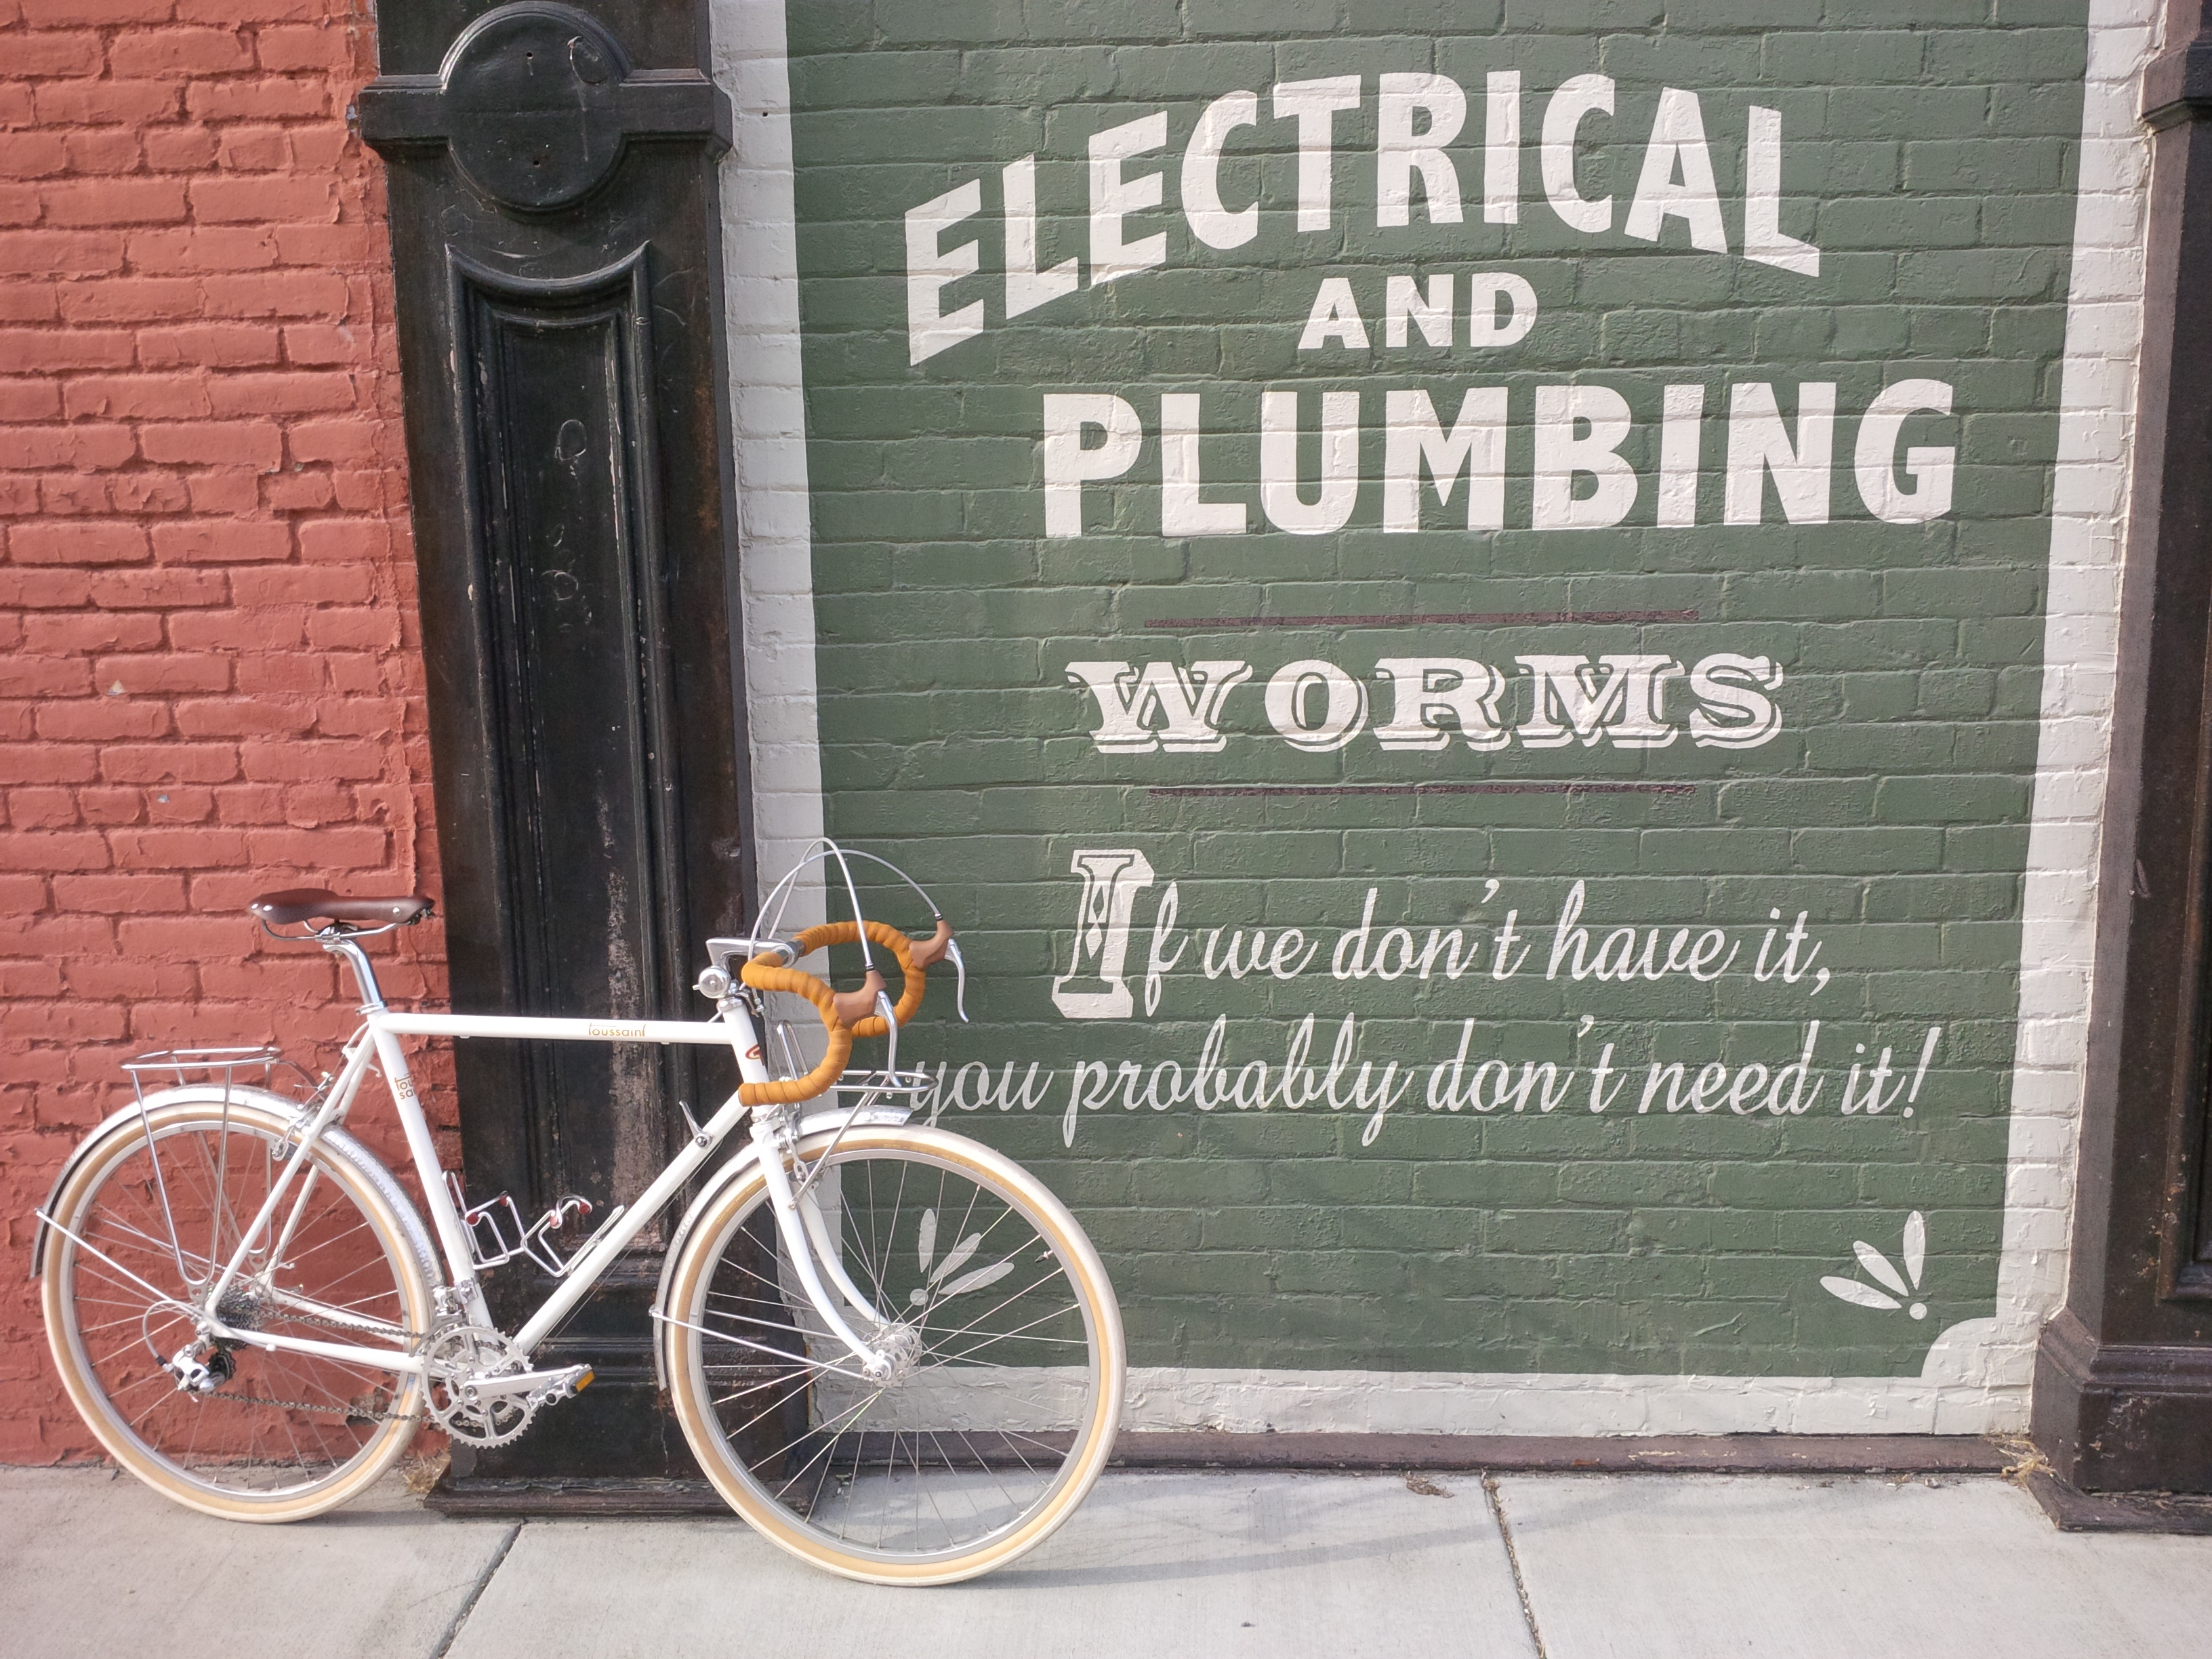
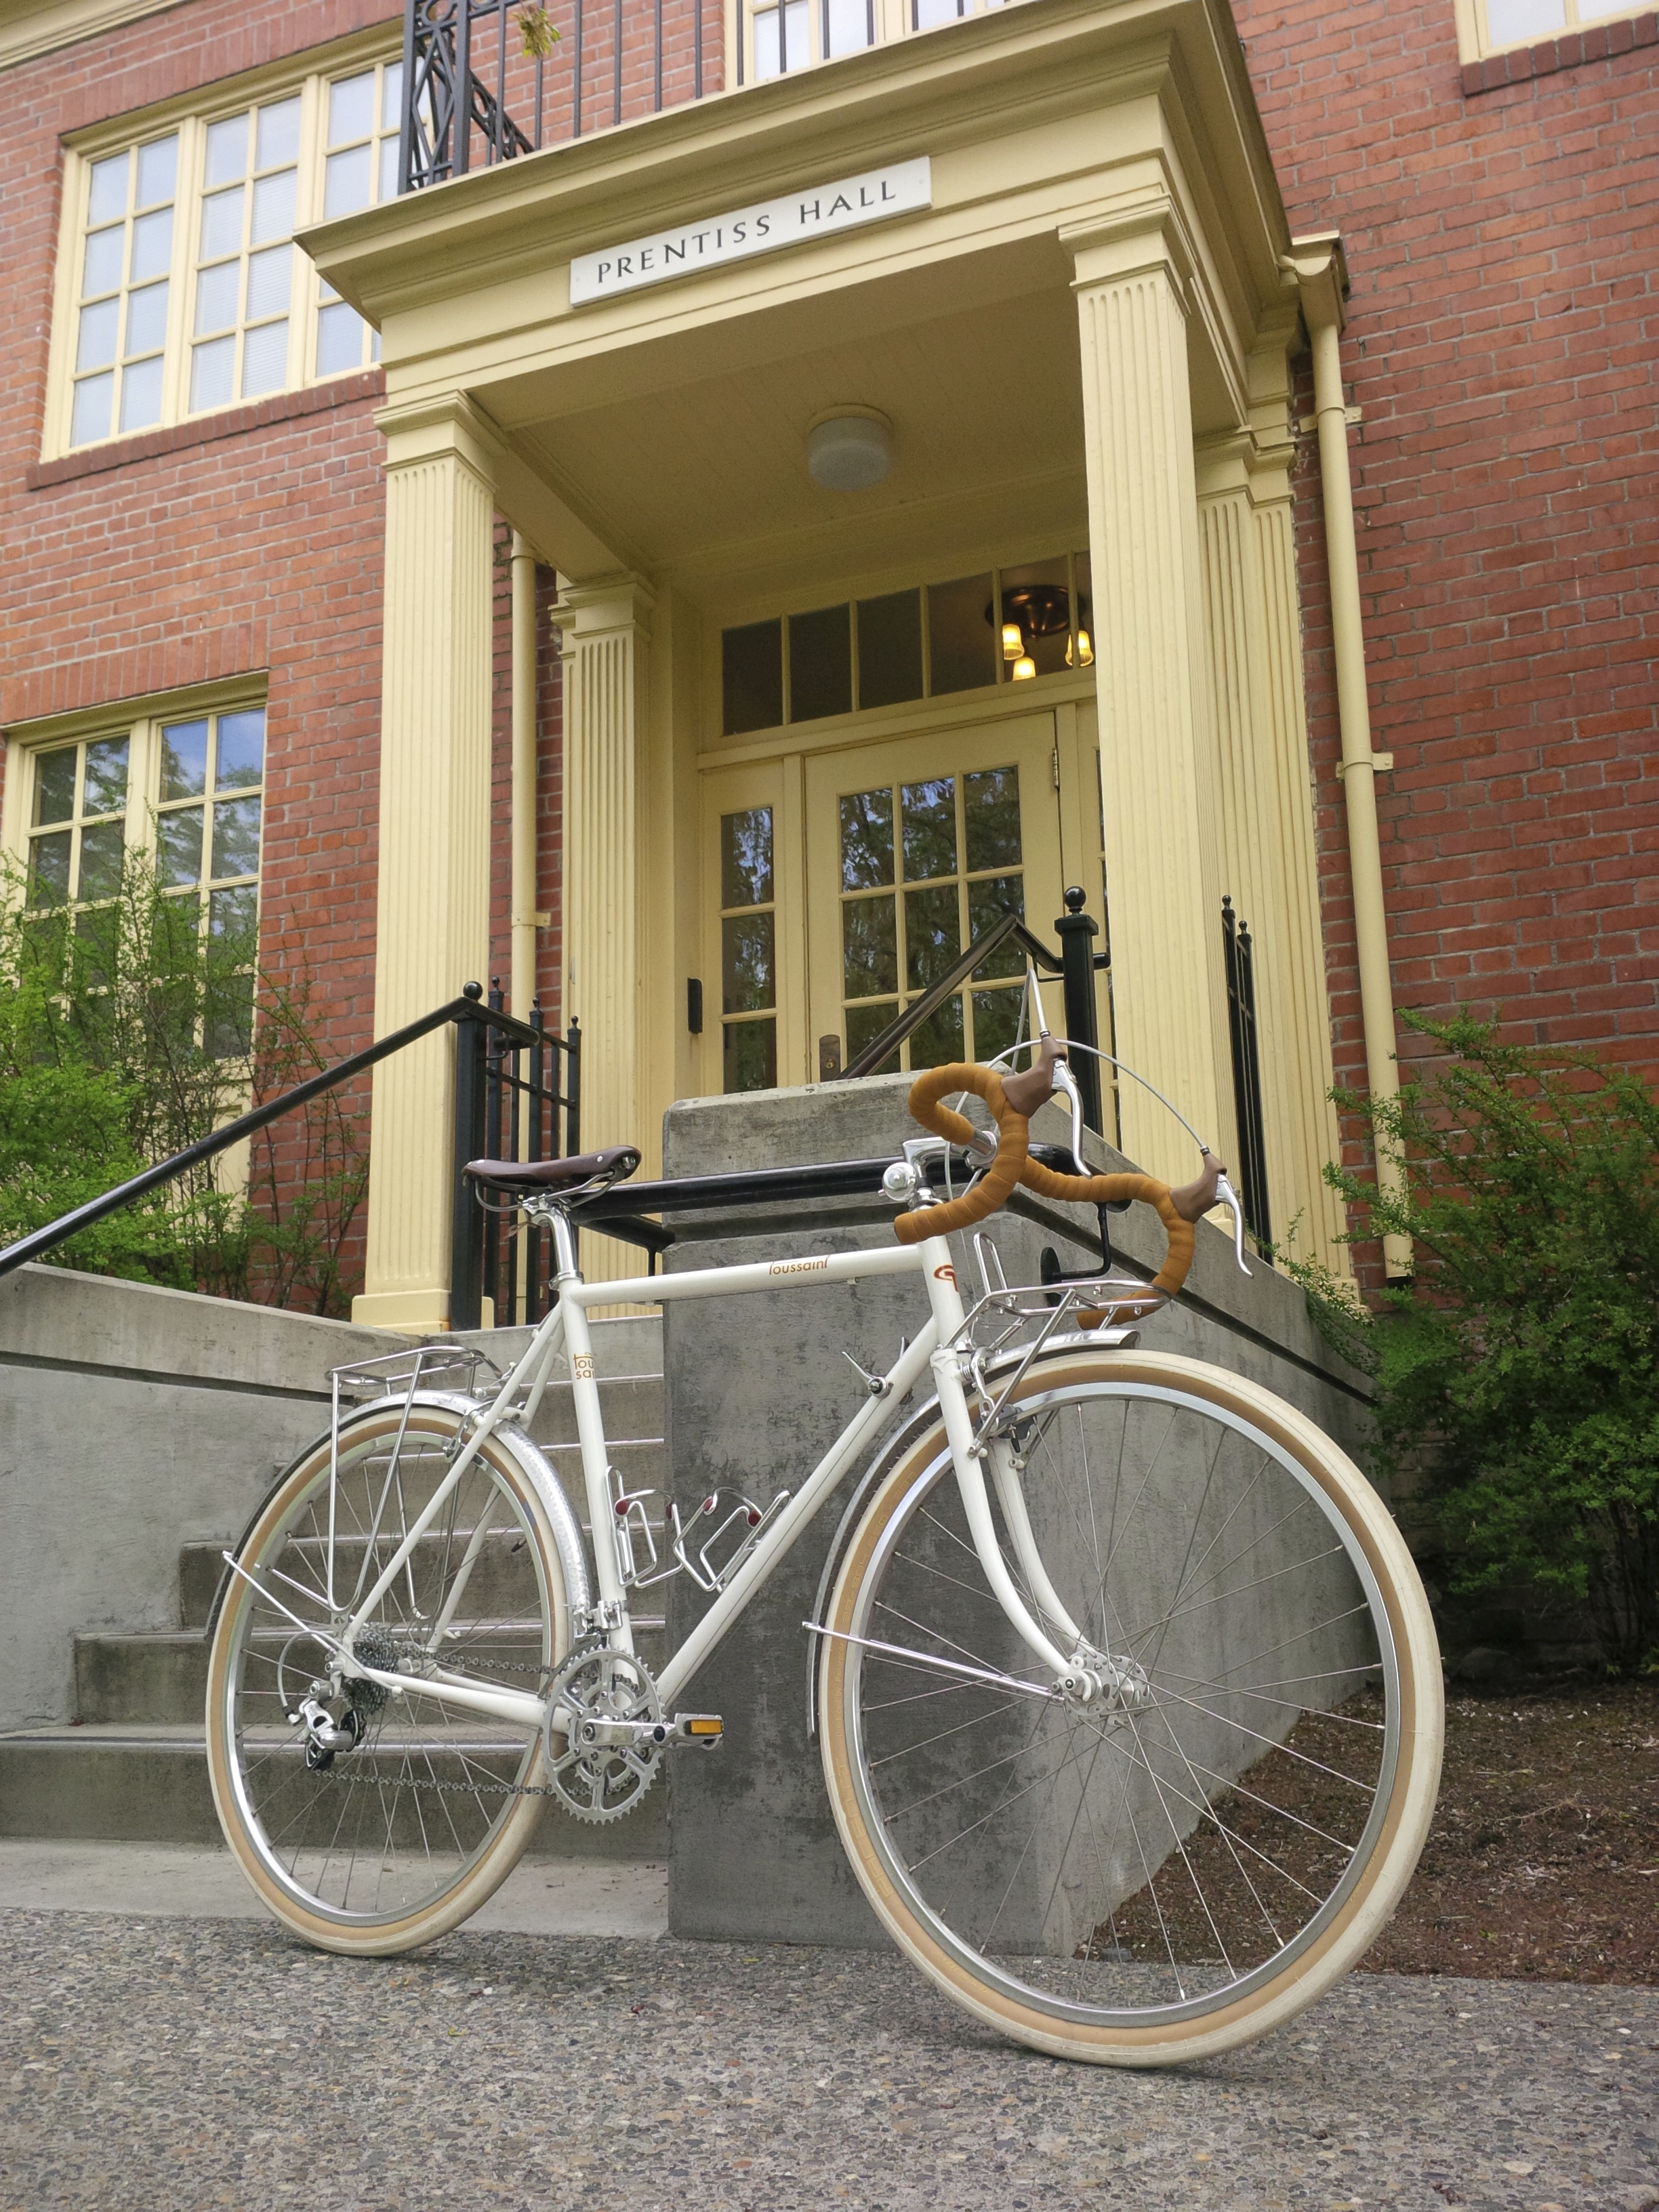
Alas I am getting a head of myself. Let me tell you how this all came about. A few weeks ago I was in Port Townsend, WA with my wife. Naturally I stopped into PT CYCLERY to chat with Bob the owner. I had bought a road bike from him because my commute/mountain bike just could not give me the need for speed that I was desiring. Well, along the wall stood this bike. At first it reminded me of bikes I had seen built in some ones garage with whatever they could find and use for parts. I myself had taken my Stingray, to us we called them Cheater Slick bikes and extended the forks to give it more of a chopper look. Needless to say we had some interesting accidents. Then I realized this was nothing like those bikes. It was funky yet in a very cool way. I loved the plates on the seat stay and forks. That and the fact it was stainless steel caught my attention. Bob let me take it for a quick spin. Those few minutes was all it took for me to realize there was more to this bike beyond just the cool look and white tires.
After returning the bike I later wrote to the guys at Toussaint and let them know what I thought. Soon after Bob texts me and offers to let me take it out for a real ride. I asked if he was joking because he could end up losing the bike. He was serious. So we made plans for me to pick it up when spring break starts. That way I had most of the week to put the bike through its paces. Let me tell you after 186 plus miles and almost 7000 feet of elevation gain I just touched the tip of what this bike is capable of doing. This with me a Super Clydesdale riding it! For those who don’t know there is basically three type of rider sizes. You have normal. Clydesdale which is anyone over 200lbs to about 250lbs. Then the Super Clydesdales who are over 250lbs and we break things a lot. I am at around 270lbs and my local bike shop can attest to the fact I am hard on rear wheels among other things.
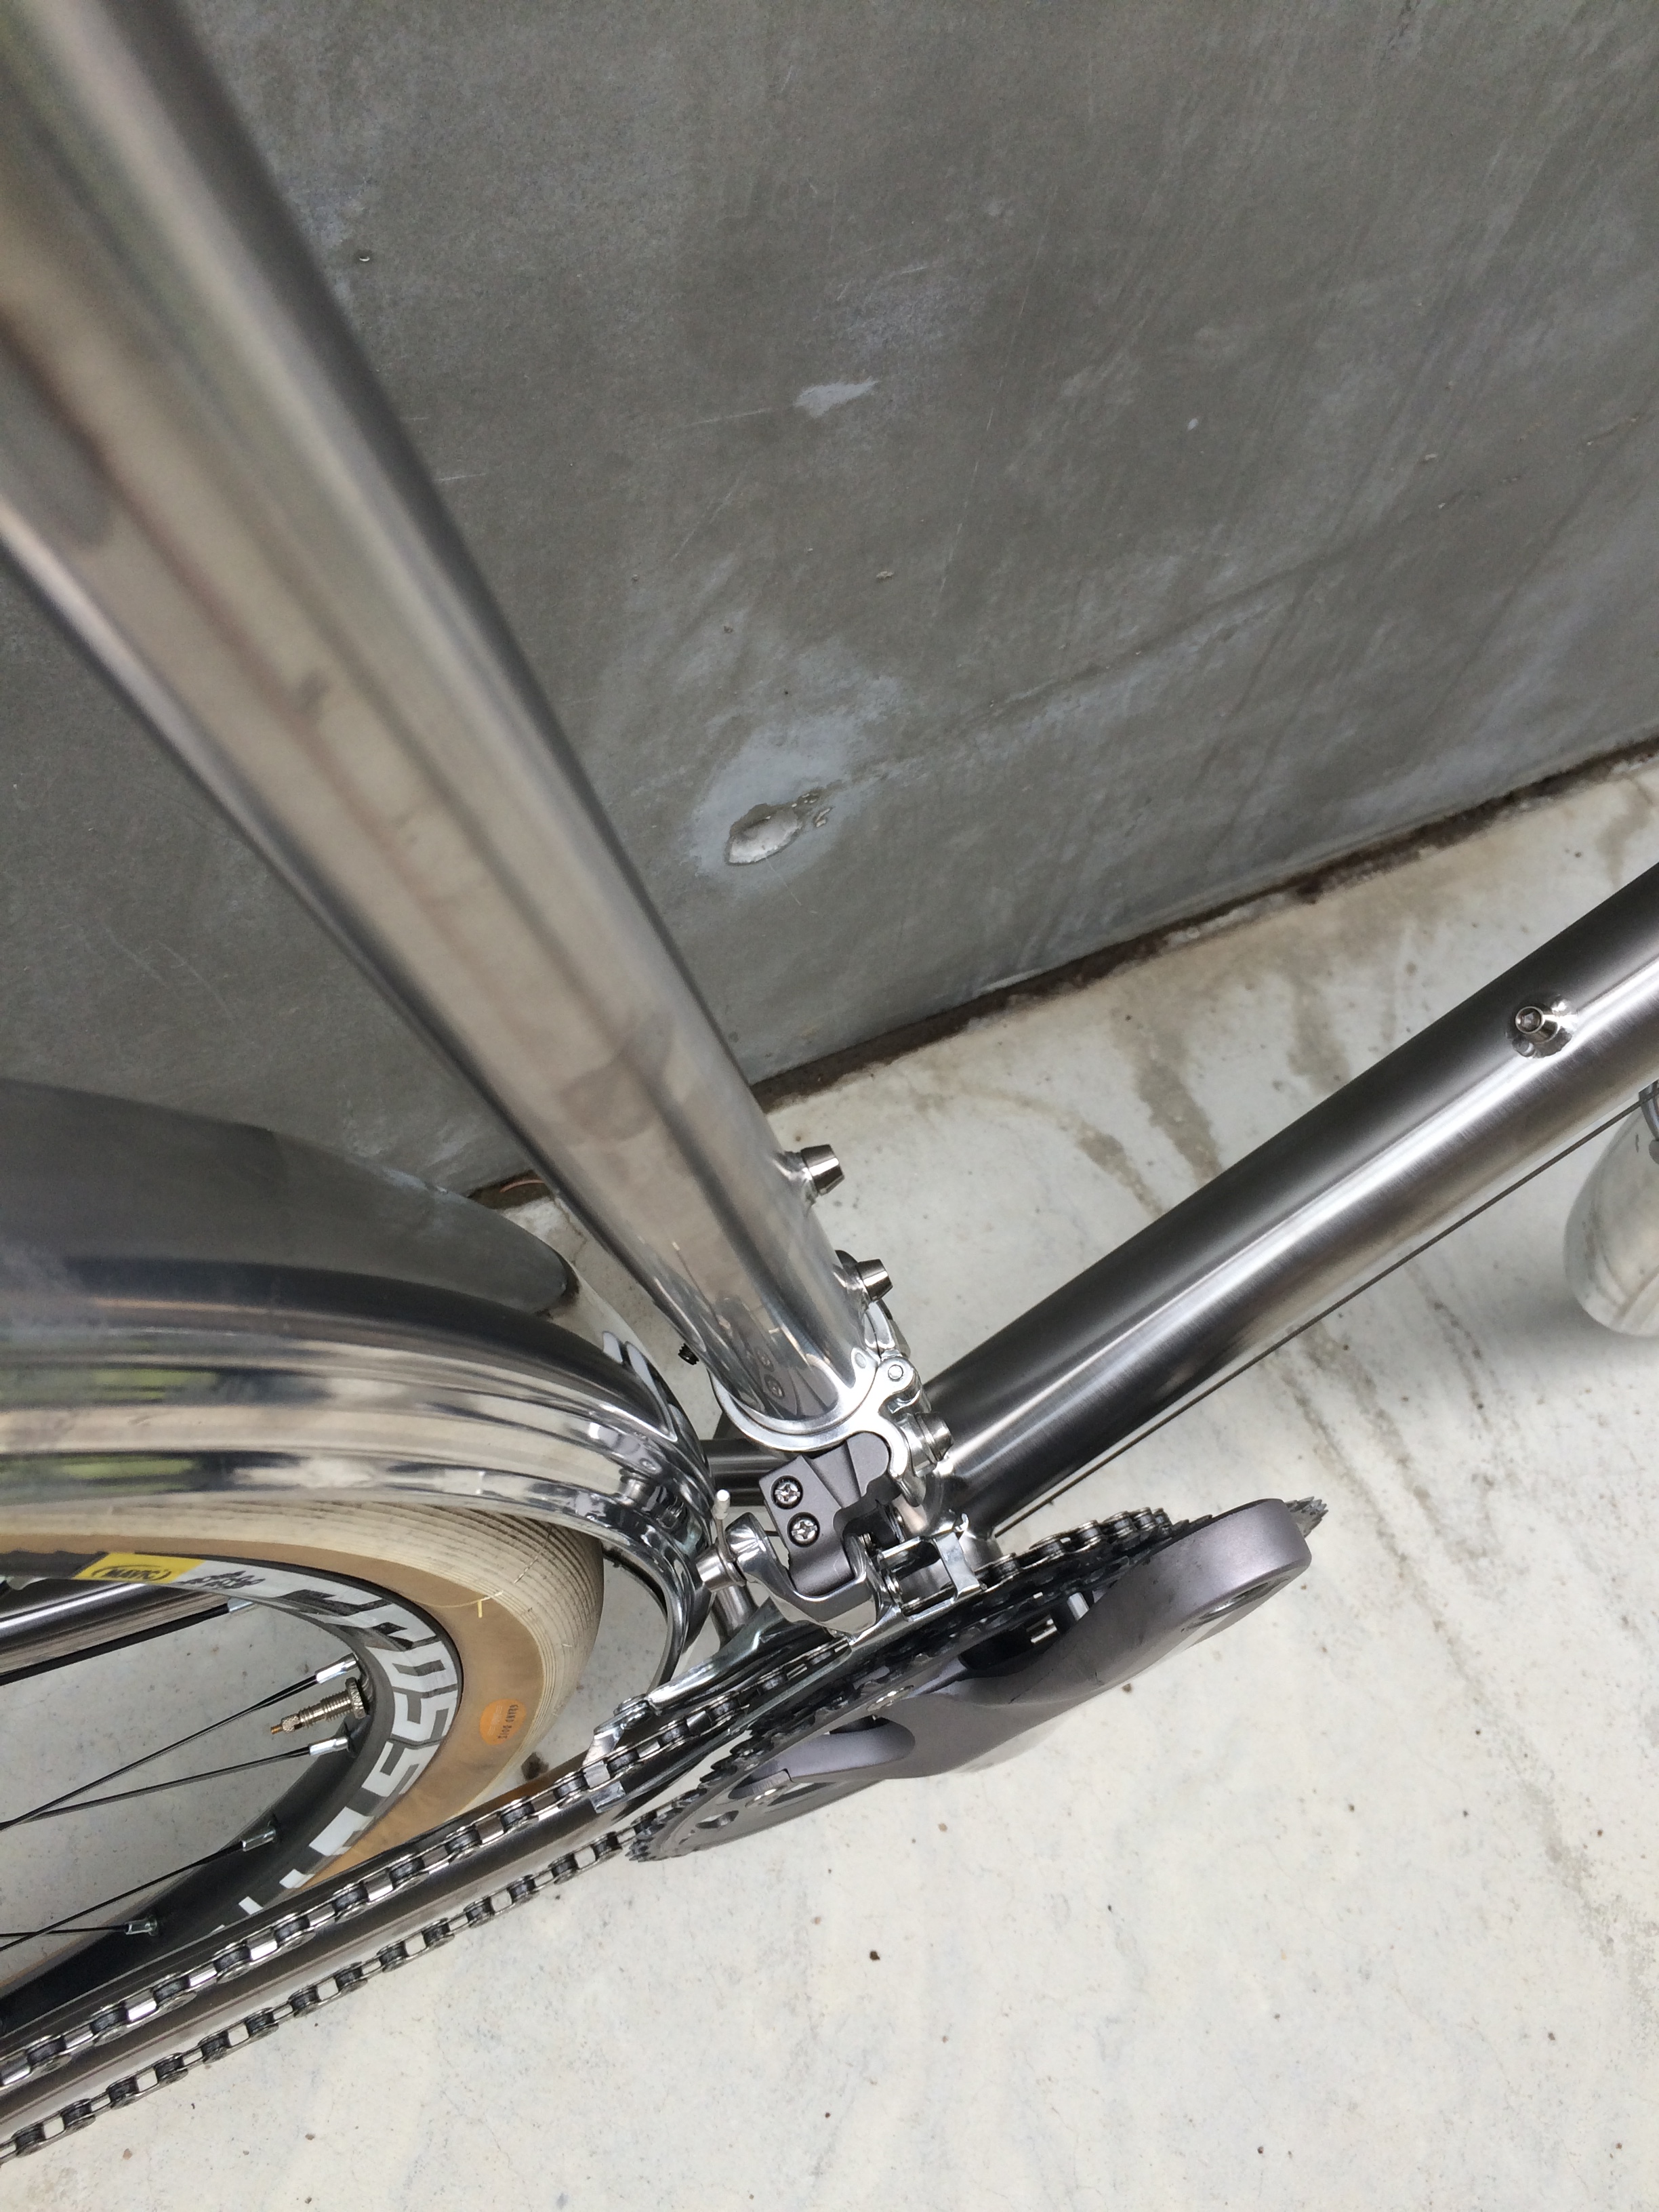
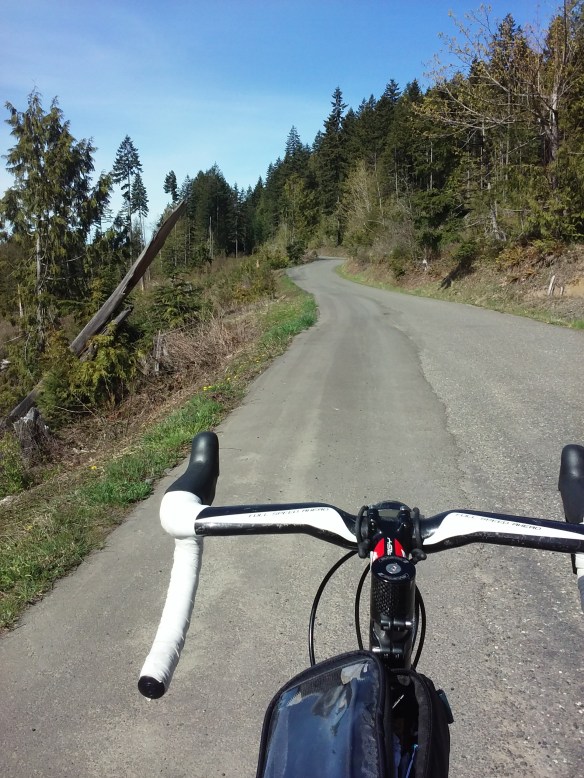
Thus the reason I was tentative on my first ride. I soon realized I had nothing to worry about. This bike would take me where ever I wanted to go and still be up for more adventures. I did group rides hanging with the lead riders. Went up dirt roads in the mountains just to come screaming down paved roads hitting speeds of over 40 mph a couple of times. Took on head and side winds like they were a slight breeze kissing my cheek as others struggled to keep their bikes steady. When I needed more speed I got it instantly like a guy using his heels to urge his horse to go faster. Again this with 32mm knobby tires.

0406161139a
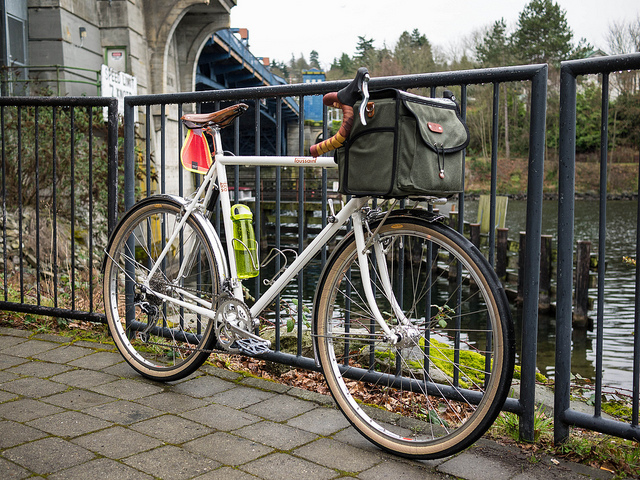
I am not going to get into all of the technical things on this bike, but I can tell you from the stand point of a Super Clydesdale if you wanted just one bike to do it all for you this is it. Rather than buy several bikes for road, CX, gravel, touring or whatever all you need to do is buy tires. The stainless steel frame and carbon fiber handlebars helped to make the ride very comfortable. Having disc brakes was also a huge plus. Oh, did I mention the bike weighed around 22lbs?
One last thing. This goes out to Bob of PT CYCLERY. You mentioned that every bike/steed should have a name. Well I gave it some thought and came up with the perfect name, Barnabas Sackett. For those who know anything about the western writer Louis L’Amour you will recognize and understand why. If not let me quickly explain. In a series of books L’Amour wrote about the Sackett family. They were strong dependable people who you could always count on when the going got tough. They were also adventurers always wanting to find out what lies past the next mountain, what awaits beyond the next bend in the river. They also took no BS from anyone. So Barnabas Sackett is the perfect name for the bike. Just call it BS for short because it won’t take any.
Thanks again for allowing me the privilege of riding a great bike and one I know will always hold a place in my heart and soul.
0406161109


David will be riding the Pave prototype again September 24th is the Big Hurt competition in Port Angeles and the bikes will heading back home to Calgary.


My Velo Routier 1.0 Build

I purchased this frame almost a year ago direct from you guys and have been slowly accumulating parts. I finished the build a few months ago and have been riding it hard since. 

For the past few years I have been looking for the one bicycle that would satisfy 90% of the riding I do: commuting, long distance riding/randonneuring, gravel and forest service road riding. One day I happened to see your Velo Routier in an issue of Bicycle Quarterly. It finally clicked that this was my ticket to the low-trail world of Alex Singer and Rene Herse without spending my life savings. Sure enough, its a bomb proof adventure machine with a surprising amount of speed. 

I built it up with the stock Cycles Toussaint crankset (I love that there is no branding) and headset, added some Nitto and Velo Orange components, eBay Ultegra derailleurs, Gevenalle cyclocross frankenshifters, and of course Mafac “Raid” center pull brakes. The 50mm VO Snakeskin fenders were a squeeze, but I have had no issues with tire-fender clearance on a multitude of gravel and dirt surfaces. I do wish I could put larger fenders on the frame so I had more wrap-around (I guess that is called the 2.0). The wheels are Velocity Synergy (O/C rear) laced to a Shutter Precision front and Ultegra rear shod with Compass Babyshoe Pass 42mm tires.

For the quintessential rando bag I ordered a custom bag from Treetop Bags in Chicago, Illinois. These bags are not very well known and are very affordable, while still being hand-crafted. I wanted a rack that sat lower than the stock Cycles Toussaint rack so I could direct-mount the fender. I didn’t want to have a custom rack made and took a risk on the Compass CP1 center-pull rack after some not-so-precise on screen measurements. The rack stays ended up being only 3mm off and I was able to get the fit with a cheap tubing bender. The decaleur is made from a P-clamp, U-bolt, and paint stir stick inside the bag for lateral support. At $10 it’s a fraction of the cost of a production decaleur and just as sturdy and light. 

I wanted dynamo powered lights front and back. But, I am not a fan of the zip tie method for wiring stock frames, especially with a taillight. It looks tacky and unfinished. To “hide” the wire, I glued it to the inside of the rear fender with automotive grade black silicone. I then ran it through the chainstay bridge hole on the fender and secured the wire to the BB cable guide with a washer. Next, I ran the front derailleur cable and the tailight wire through some shrink tubing up along the down tube (I stole the idea, works great) and then in and out of the front fender to the headlight. For the dynamo wiring I fished the wire through the rack boss on top of the fork crown, down through the blade, and out the vent hole. Unless you are looking for it, the wiring is all but invisible! 

I attached some pictures as well. Thanks for the awesome ride! 

Cheers,

Jay 

Tacoma, Washington

Stainless Steel Vélo Routier Prototype

We have been riding our second stainless prototype around Calgary for the last 2 months and were supposed to report back on it weeks ago but summer has been really nice here for a change and well, you know how it goes…

The protoype is a 650B frame based on the same low trail geometry as our cro-mo 650B Velo Routier frame. .Like the Pavé Prototype, it is made from Carpenter stainless steel with a twin plate crown fork, disc brakes and 1-1/8″ Aheadset.


2015-06-30 17.43.18


We stuck to the tried and true Velo Routier V1 geometry and made a few improvements to increase fender/tire clearance.

Top Tube 31.8mm Dia 0.7/.04/0.7
Seat Tube 31.8mm Dia 0.7/0.4/0.7
Down Tube 38.1mm Dia 0.8/05/0.8
Top Tube Length 550mm
Seat Tube Length 540mm

Chainstay length 430mm
Bottom Bracket Drop 64mm
Wheelbase 1028mm
Head Tube Angle 73 deg
Seat Tube Angle 73 deg
Trail 30mm
Rear Axle Width 135mm

It has clearances to accommodate 54-55mm wide fenders and braze-on fixtures to attach fenders and racks to. We fit up our prototype with 52mm Velo Orange Zeppelin fenders. A rfear fender attachment to the underside of the seat stay bridge was spec’d but missed on the fabrication of the prototype.

2015-06-30 17.44.302015-06-30 17.45.39

We deigned an all stainless steel with a twin plate fork crown similar to the Pavé. Unfortunately, the prototype is also missing the top of the crown fittings.

2015-06-30 17.45.00
Bare frame weight is 1998 grams vs. 2177 grams for medium cro-mo VR 54 cm frame and the bare fork weight is 926 vs. 958 grams. Even accounting for the extra weigh of the disc brake fittings, it not a huge weight saving for you weight weenies but we think the ride is super smooth and frame is bomb proof ! With a bit of refinement, we think we might be able to shave another 50-70 grams off but not the at expense of durability.

2015-06-30 17.44.48

The Pavé protoype is at Free Range Cycles in Seattle for the next couple of months and the stainless steel VR prototype should there in 2-3 weeks. If you are in the area, drop by and say hi to Kathleen. Give our prototype a good test wring out – we really want to hear your comments and suggestions!


Fenders and Tire Clearance

We’ve had some questions about fenders and tire clearance so thought we would write a quick blog post. There is an ongoing debate “out there” about the balance between safety, tire clearance and aesthetics. Lower clearance between the tire and the fender looks slick but the chance of a piece of debris lodging between the two increases. We have set up the Velo Routier with a the higher clearance but with an eye to good aesthetics. Our current bikes come equipped with 38mm Pacenti Pari Moto 650B tires under 46mm wide fenders. The clearance between fender and tire is approximately 10mm. The tires also have no problems fitting between the chain stays. We have had enquiries about fitting 42mm Grand Bois Hetre 650B tires. These tires will fit. We have tested a set on the Velo Routier on the country back roads of Alberta Rockies without problems. The clearance will only be about 5mm under the 46mm fender. A 50mm fender would probably be better for clearance but it would be a very tight fit on our bikes. See the attached photos. Please feel free to send us your pictures if you ride our bikes with 50mm fenders. As we finalize our 2015 design in the next couple of weeks, we are considering “squishing” the chainstay a touch more. The final decision will be based on practicality, ridability and safety. Enjoy the journey, Angus.

IMG_20150125_211752

IMG_20150125_211625-2


Never mind the bling, I’m a working bike

So I pull up to a stoplight, and there’s a rider on a $9 000 carbon road bike admiring his reflection in a shop window. He sees me pull up and does a double take but says nothing – just fixes his gaze forward. Whatever, I’m used to it.

My name is Jacques and I’m a Cycles Toussaint Velo Routier. I understand everyone’s confusion. My brothers and sisters and I all have the looks to be café poseurs – gumwall tires, cream paint, retro drop bars, polished stainless racks front and rear. But, my gumwalls are covered in road grime, my rear rack has a mixed luggage set of a laptop bag and an ancient serratus pannier full of office clothes. My front rack has a $10 Rona tool bag bungeed to it (this was added when Mike, my rider, realized I like to have my load balanced front to rear so tools, raingear, tubes and lock now ride up front).

See, while I have the looks, in fact, I’m a working bike. Sure, I’d like to go on epic rides through rolling green fields of Provence, Tuscany, or anyplace that is evocative of Provence or Tuscany. I’d like to climb the Alps, Rockies, or Green Mountains. But, for now, I cruise the mean streets and bike paths of the Toronto as a commuter.

Sorry of this seems immodest, but I’m pretty good at it. My frame and racks can carry the gear, my fenders keep rider and stuff clean when it rains. A compliant frame and big cushy tires soak up the cracked pavement. In many ways, I have more in common with the slick shod mountain bikes with whom I share the paths than the carbon road bikes and hipster fixies (note – nothing wrong with either, I’d share a garage with any bike). What I have over the mountain bikes is legs – I’m leaner, lower, smoother. While my heavier frame and tires means I can’t accelerate like those fancy road bikes, I give up little or nothing in terms of rolling resistance and aerodynamics. So, when there’s a clear path ahead, I can stretch out and pick up a gear or two.

Speaking of gears, one thing my rider did that hurt the show but helped with the go was to install a set of Microshift integrated shifter/levers. I know, not retro and the black hoods meant the crème bar tape had to go. But, dodging potholes, cars, pedestrians and slower bikes in the city, keeping hands on the bars while shifting matters. They work well and I overhead Mike telling another rider they shift almost as smoothly as the Ultegra STI levers he had on his old race bike.

Smooth matters. You can read about the theory that a more comfortable (bigger, less inflation pressure) tire saves the rider energy on bumpy surfaces. There is something to that. But, there’s also something psychological. Let’s face it, much as we hate to admit it, bikes make little difference – it is all about how much energy the rider can / chooses to expend. And, I’ve noticed that when things are smooth (tires inflated just right, clean chain, rolling along like some great flywheel), my rider puts in a little more effort. It is subtle, but, KM after KM, it adds up.

See, in addition to hauling the gear through frost heaved streets and distracted drivers, my job is to make it a joy to ride. The better it feels, the more my rider will make time to ride, the harder he will push, and the stronger he will get. Then, maybe, just maybe, he’ll take me on that vacation to Tuscany, or Provence, or someplace like that.

My name is Jacques. I’m a working bike, but I have dreams too.

My first weekend with a Velo Routier

I headed to Walla Walla, Washington in late April with my son. My son was competing in the Tour of Walla Walla Stage Race. This annual race presented by Allegro Cycle draws hundreds of riders from the U.S. Northwest and Canada. Walla Wall is located a few hours drive south west of Spokane. As one gets closer, the green rolling terrain appears to be stripped directly from a Microsoft Desktop Background.   After all of those years of staring at my PC, it now seems crazy not to think that the background was based on an actual location. All the towns in the Walla Walla area are wonderfully cared. The downtown Walla Walla core is alive with café’s, restaurants, boutiques as well as Whitman College. Apparently, there are over 100 vineyards in the surrounding area. Walla Walla like many US towns has big box stores that encircle the town. But, Walla Walla has not been hollowed out by their presence and have kept the downtown core vibrant.

I had never ridden a Velo Routier before this weekend or taken it out in public. It really seemed to be a conversation starter at the Tour stages and stand out in the crowd.  The Velo Routier always brought smiles to people’s faces. I received compliments across the spectrum. Even a few of the pro riders asked to check it out. The bike seems to have a timeless quality as folks would ask “Is it new?” and “Is it old?”. Watching the Time Trial (TT) start, the character and lines of the Velo Routier seemed juxtaposed against the robotic, heartless, singular tasked carbon TT bikes waiting in a line for their start times.

Riding the bike feels casual and comfortable. But don’t be fooled as this bike can get you smartly to your destination whether running errands or touring across secondary roads. It is a smooth ride on gravel, rough pavement and even the occasional bumpy field for a short cut.

My one complaint is that the bike always seemed to keep drawing me closer to any establishment that provided food and/or drink. Here are some great places to try if you are in the area:

  • Breakfast at the Maple Counter Cafe
  • French Macarons along with Assame Black Tea at the Walla Walla Bread Company
  • Paris-Brest Pastry at the Colville Street Patisserie. (Never before have my eyes closed and rolled into the back of my head on a first bite)
  • Dinner at the Whoopemup Hollow Café in Waitsburg, Washington

Safe Travels, Angus Cowan

IMG_20140419_082235IMG_20140420_095639IMG_20140420_162303IMG_20140420_164711On Campus @ Whitman College


Stonehog Velo Routier Build Review

Brian has posted a detailed review of his Velo Routier frame build on his Cycle Settle Stonehog blog. Here is a picture from his site to pique your interest.


Stonehog Velo Routier 1

Note the tasty Rene Herse crank and Acorn Boxy Rando front bag. And the green grass and open water in the background. On a more than slightly jealous note, here at the Toussaint world HQ we have been hunkered down to temperatures in the  -20 C to 30C range for the last 3 weeks and some side roads with ice ruts, I kid you not, a foot deep. But we are catching a break, it supposed to warm up to  a relatively balmy +6C today. Time for a pond hockey break!


Guest Post | Another Velo Routier Review

Jim's  60cm Velo Routier Build  Vancouver BC - 2

My journey to the Cycles Toussaint Velo Routier started with an impulsive act in October 2011. During Bike to Work Week Vancouver I ended up at an information session for The Ride to Conquer Cancer. Somehow I said to myself “I can do that” and signed up.
What was I thinking! I was moved by the stories I heard but up until then my idea of “cycling” meant going out on a sunny afternoon and tearing around town for a couple of hours. I spent the following winter living in terror that I wouldn’t raise enough money or get in good enough shape to complete the 120km/day, two day ride, embarrassing myself before all the people I hit on for donations. I rode religiously, read books on training and by December realized the vintage Italian race bikes I was riding were not the right type of bike for this ride.

Consequently I picked up a modern sport touring frame (Soma ES) and set it up with a triple crank with lots of low gearing, fenders and big fat 28mm tires. The day of the ride came and I had a ball. Lots of riders on fancy carbon bikes with skinny tires passed me but eventually I passed many of them on the side of the road fixing flats. It also rained for most of the first day and a half so I was grateful for the fenders. This led to more 120+km rides over the summer and a newly discovered love of distance cycling but also to an increasing feeling that this bike was just too much “touring” and not enough “sport”.

The Ride to Conquer Cancer terminated in Seattle and the following day I had visited Elliott Bay Cycles near Pike Market. The place is a museum of vintage bikes and in the store was this slightly odd looking custom bike with a $7,000 price tag. Bob Freeman, the owner explained “that’s a 650B wheeled bike, they have quite a following here in the Northwest”. This sparked my curiosity and I started researching what these bikes were about. From what I could find out, they offer the smoothness and comfort of a wider tire with less mass and greater speed than 700c wheeled bikes.

Well I’m not in the league to pony up $7,000 on a type of bike I’ve never ridden but I also discovered lots of people were taking regular frames and converting them to 650B wheels. As a result I spent the winter repainting a frame and building my own 650B conversion.
My goal was to get the bike completed in time for the Tour de Victoria where I was signed up for the 100km leg. I built the wheels and installed Dai Compe 750 center pull brakes. The long-reach brakes were necessary to reach the braking surfaces on the smaller 650B rims. Three hundred kilometers of test riding in flat, dry Delta where I live gave me the false impression I was ready.

The day of the ride dawned cold and damp and I knew the moment I rode up to the start line that my brakes were not handling the wet that well. No problem I said to myself, “I would take it easy, this is a ride not a race.” The first challenge was a long, steep climb up Munn Road. On the way to the top it began to rain in earnest. I reached the top OK but was not expecting the steep and narrow descent that followed. Within 200 meters I was fighting to control the bike and picking up speed. A third of the way down at about 50km per hour my wheels locked up throwing me to the ground. The next thing I knew I was looking at the sky trying to breathe. Medical support arrived quickly and I was transported to hospital where I spent a week with a broken collar bone, broken ribs and a collapsed lung.

Lying around rehabbing gives you lots of time to think and I was already planning a safer 650B bike. I had checked out the Velo Routier the winter before and decided I liked the fact it was a Canadian company but most of all I liked the braze-on brake mounts. I had never cared for cantilever brakes and thought they looked out of place on a road bike. I ordered the bike and it was delivered within a week. During that week I picked up a new Ultegra 10 speed compact group on Craigslist and ordered online a set of matching hubs, Dura Ace 10-speed bar end shifters and Cane Creek SCR-5 Brake Levers. Most of the rest of the components would move over from the conversion. These included a Nitto Technomic 80mm Quill Stem and Nitto Rando Bars, Velocity Synergy Rims with an OC rear, Velo Orange Hammered Fenders, Brooks Pro Saddle and Soma Crane Brass Bell. Most ironic is the fact that the same brake calipers that landed me in the hospital, minus their wobbly center pieces, bolted straight onto the braze-ons on the Velo Routier. Finding nice, “look alike” 6mm chrome hex bolts to attach the calipers led me to an online motorcycle supply outfit in North Carolina, Scootworks.com (great service, inexpensive and fast shipping!).
When the frame arrived I excitedly set about rust proofing it but when I assembled the headset I discovered that I had been sent a mis-matched frame and fork. The frame was 60cm and the fork for a 57cm bike. An email to Evan at Cycles Toussaint quickly remedied the situation and within a week I received a fork for the 60cm frame and a 57cm frame. This was a blessing in disguise as I had agonized over what size to order. I normally ride a bigger frame than my height might suggest but I was just not sure about a frame with low trail geometry. I built out the 60cm frame first and it turned out to be just right for me. The second frame will be sold off for charity.

The build was remarkably easy! The fenders which had been a real chore fitting to the non-650B frame went on to the Velo Routier like soft butter on hot toast. The matching rack from Velo Routier is a very attractive addition and went on like it was made for the frame (it was). The only unexpected issues were the stack height for the headset was a bit long even after adding a center-pull quick release hanger and the brake set I had chosen did not allow for releasing the rear brakes to clear the wider tires. The stack height was remedied by a quick visit to my LBS for an additional headset spacer and the rear brake clearance corrected by a couple of inexpensive Jagwire in-line adjusters.

As I am still rehabbing from my crash I have only had a couple of short runs to date but the ride is dreamy and fast. The brake power and modulation is excellent. I’m running 38mm Panaracer Col de la Vie 650B tires which are comfy and quick but would love to see how the bike handles with a set of Grand Bois Hetres. I am a born-again convert to 650B bikes and recommend them to anyone but if you are thinking of building a conversion, I say be very careful!

Jim Sutton
Tsawwassen British Columbia Canada

Customer Builds

It’s been a busy summer and I am finally getting  around to posting some pictures of some customer builds.

I like to call this one the “Speedster”. A 54cm Velo Routier with Nitto moustache bars and white Soyo NJS grips and no racks. The owner agonized whether to leave fenders off, I’m glad he left them on. DSC_0114DSC_0115

This Velo Routier build was for a 6’5″ customer for commuting. It was a bit a rush job as he wanted to get most of the short Canadian summer but I managed to locate a supply of steel mustache bars for him ( I have 2 left) as he is solid 240 lbs and want a stiffer set of bars. We installed microSHIFT 10 speed bar ends BS-T10 shifters for him and some large pedals for size 13 feet.

Cycles Toussaint Velo Routier 650B Commuter Bicycle 1

Cycles Toussaint Velo Routier 650B Commuter Bicycle 60cm 2

My Personal Velo Routier Build

Evan_VR_9 - Copy

I finally managed to build up a Velo Routier up for myself. I wanted a bike ready for commuting and multi-day unsupported rides. No camping for me, but I need the capacity to carry clothing, and gear for any combination of snow, hail or torrential rain and temperatures that range from -10C to +30 C which are all possible on the same day out here in Alberta where we live and ride!

Evan_VR_7 - Copy

I went to my parts bin and put together a mix of classic and modern. I stuck with our stock wheeset (Jetline rims, SS 15g spokes and Access seal hubs) but went with a bit heavier rubber with Grand Bois Herte tires and with our ultralite Maxxis inner tubes. Other stock parts inclulded a Luxe crankset (46T-30T), Kalloy seat post and my nicely broken-in Gryes leather saddle which I moved off of our prototype 2 bike.

Evan_VR_5 - Copy 

I decided to have a little fun with the drive train with a Huret Jubilee long-cage rear derailleur, Mavic front derailleur and Simplex Retro-friction shifters. I mounted the shifters in a nod the 1970’s weight weenies, front shifter on the downtube and rear shifter on a Dia-Comple bar-end pod – saves a few grams on a shorter cable run and one less barend shifter pod :-). I used a SRAM 8-speed chain and cassette which worked great with the old Huret and Mavic derailleurs and have the benefit of being available in small town shops in the case of a repair.

Evan_VR_6 - Copy

Stopping is supplied by Mavic Raid brakes. Greater fender clearance and cool factor aside, they are noticeably more flexible than the Dia-compe 750. While I want to match the Raid brakes with classic Mafac half-hood levers, I stuck with the Dia-Compe DC204QC brake levers as I have not been able find a pair with hoods in decent condition. To think those levers were as common and unloved as dandelions when I was a kid!

I mounted the front and rear rack in traditional constructeur fashion to the top of the fenders with bolts and leather washers. A Velo-Orange decaleur mounted to a Stronglight A9 needle-bearing headset with TTT handlebars/stem and shellaced Tressostar cloth tape. I have no idea how anyone wraps a set of bars with 2 rolls Tressorstar, I always end up using 3 rolls.

I’ll be riding it my annual Rocky Mountain 4-day extended weekend tour starting this Saturday. This year is the our easy route with four 100 km days, two of which are pretty flat and two day that end at the Radium Hot springs. June is the wettest month of the year on the eastern slopes but traffic is light as the tour buses and RV’s are not out in full force yet.